Balance sheet page in the presentation builder
Last updated: May 7, 2026
The balance sheet includes highly configurable settings, all of which can be changed from the balance sheet page in the Estate tab, and the balance sheet section of your presentations. Create multiple balance sheets and manage settings on each by following the below steps.
Adding a new balance sheet view or full balance sheet
From your presentation, click the three vertical dots next to the balance sheet title page
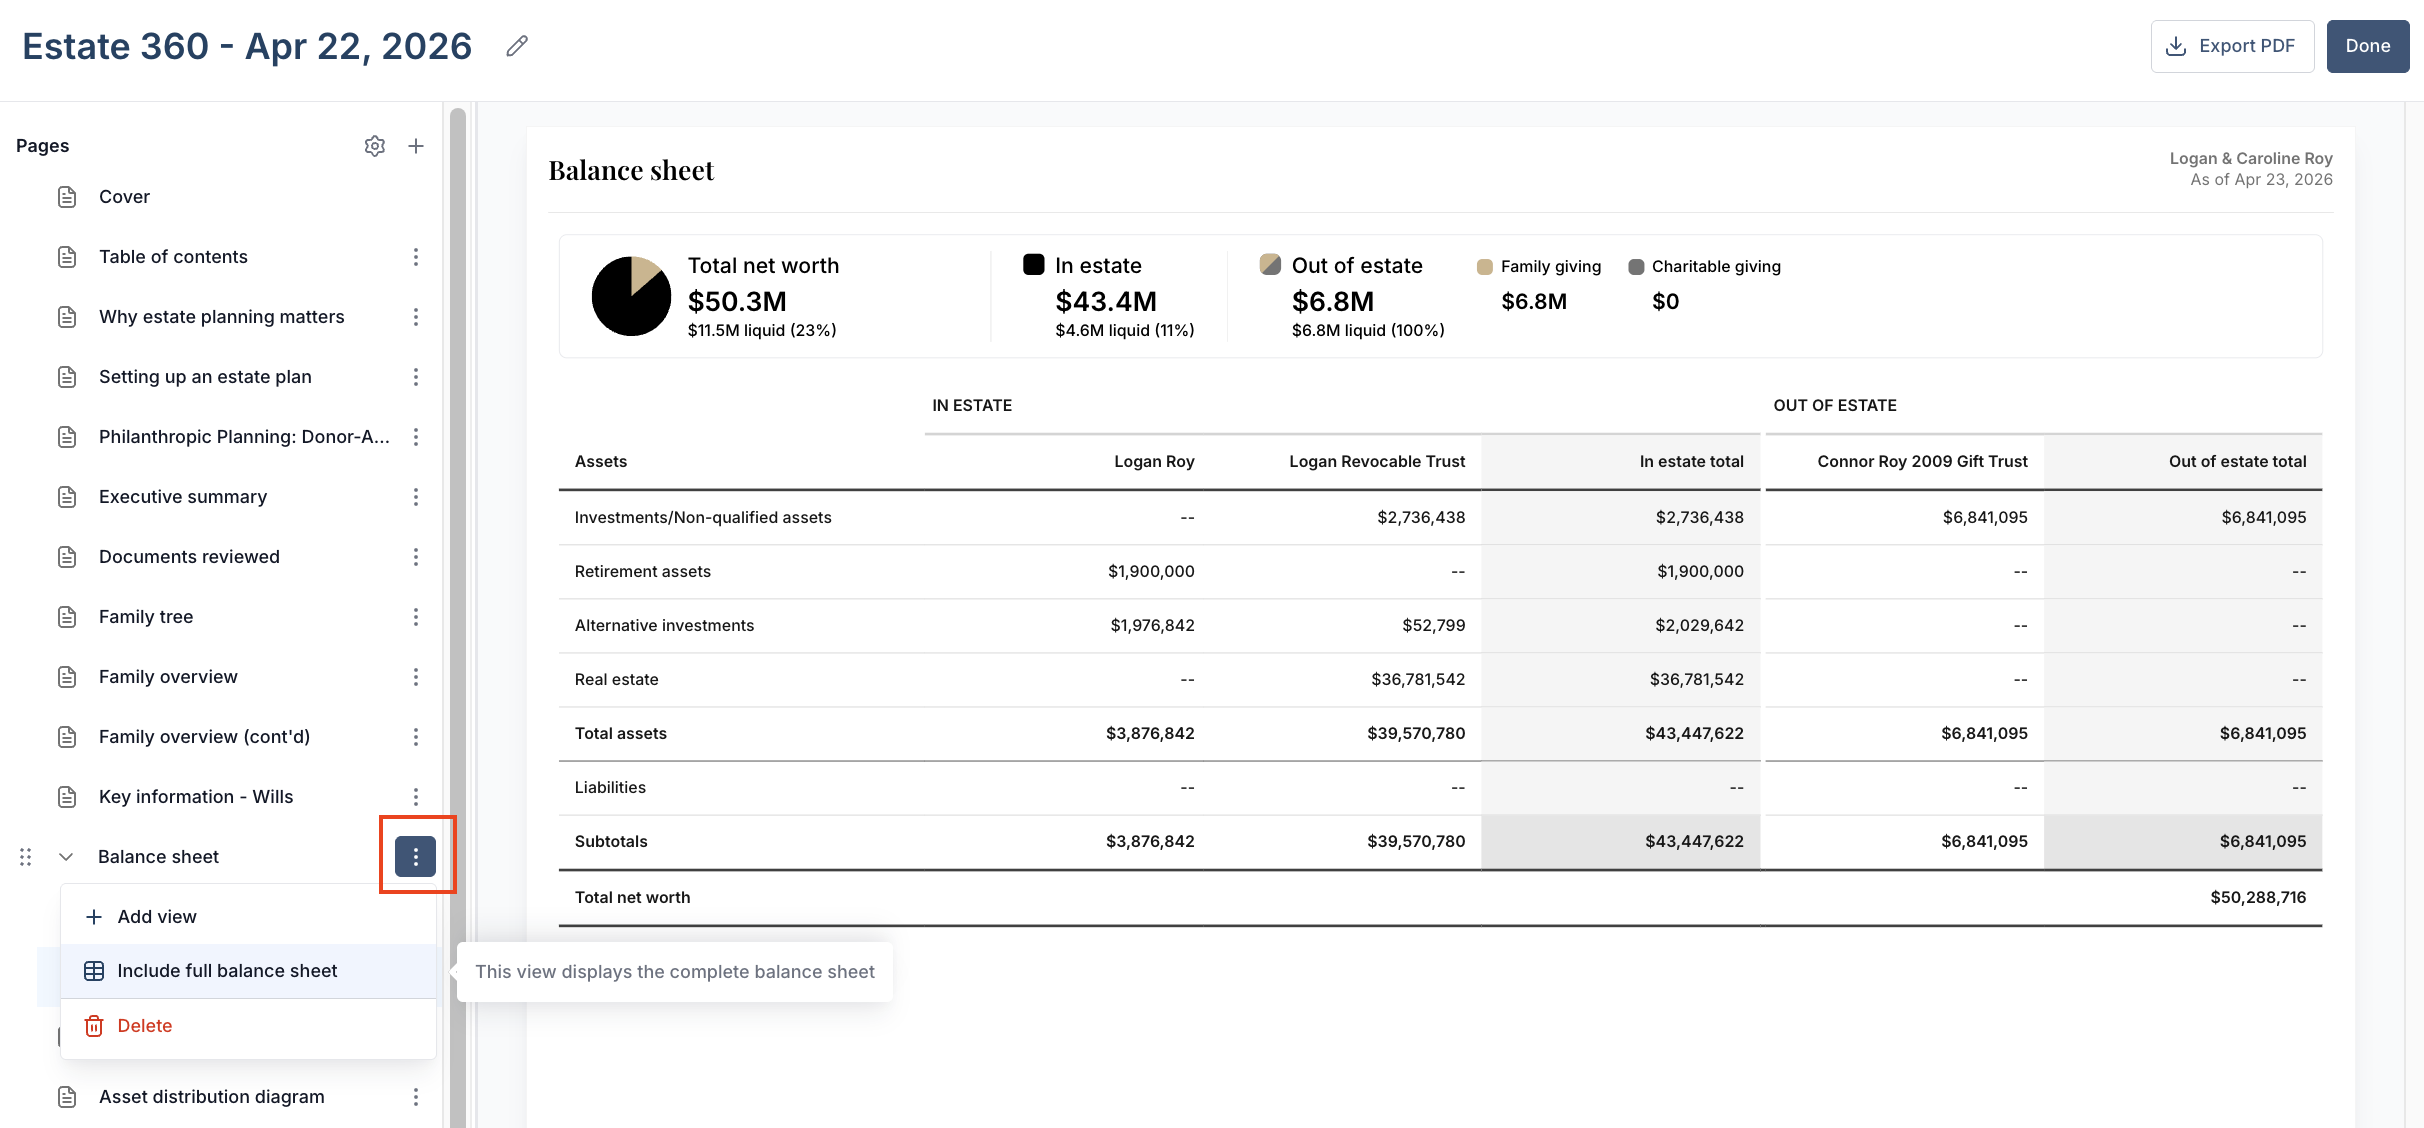
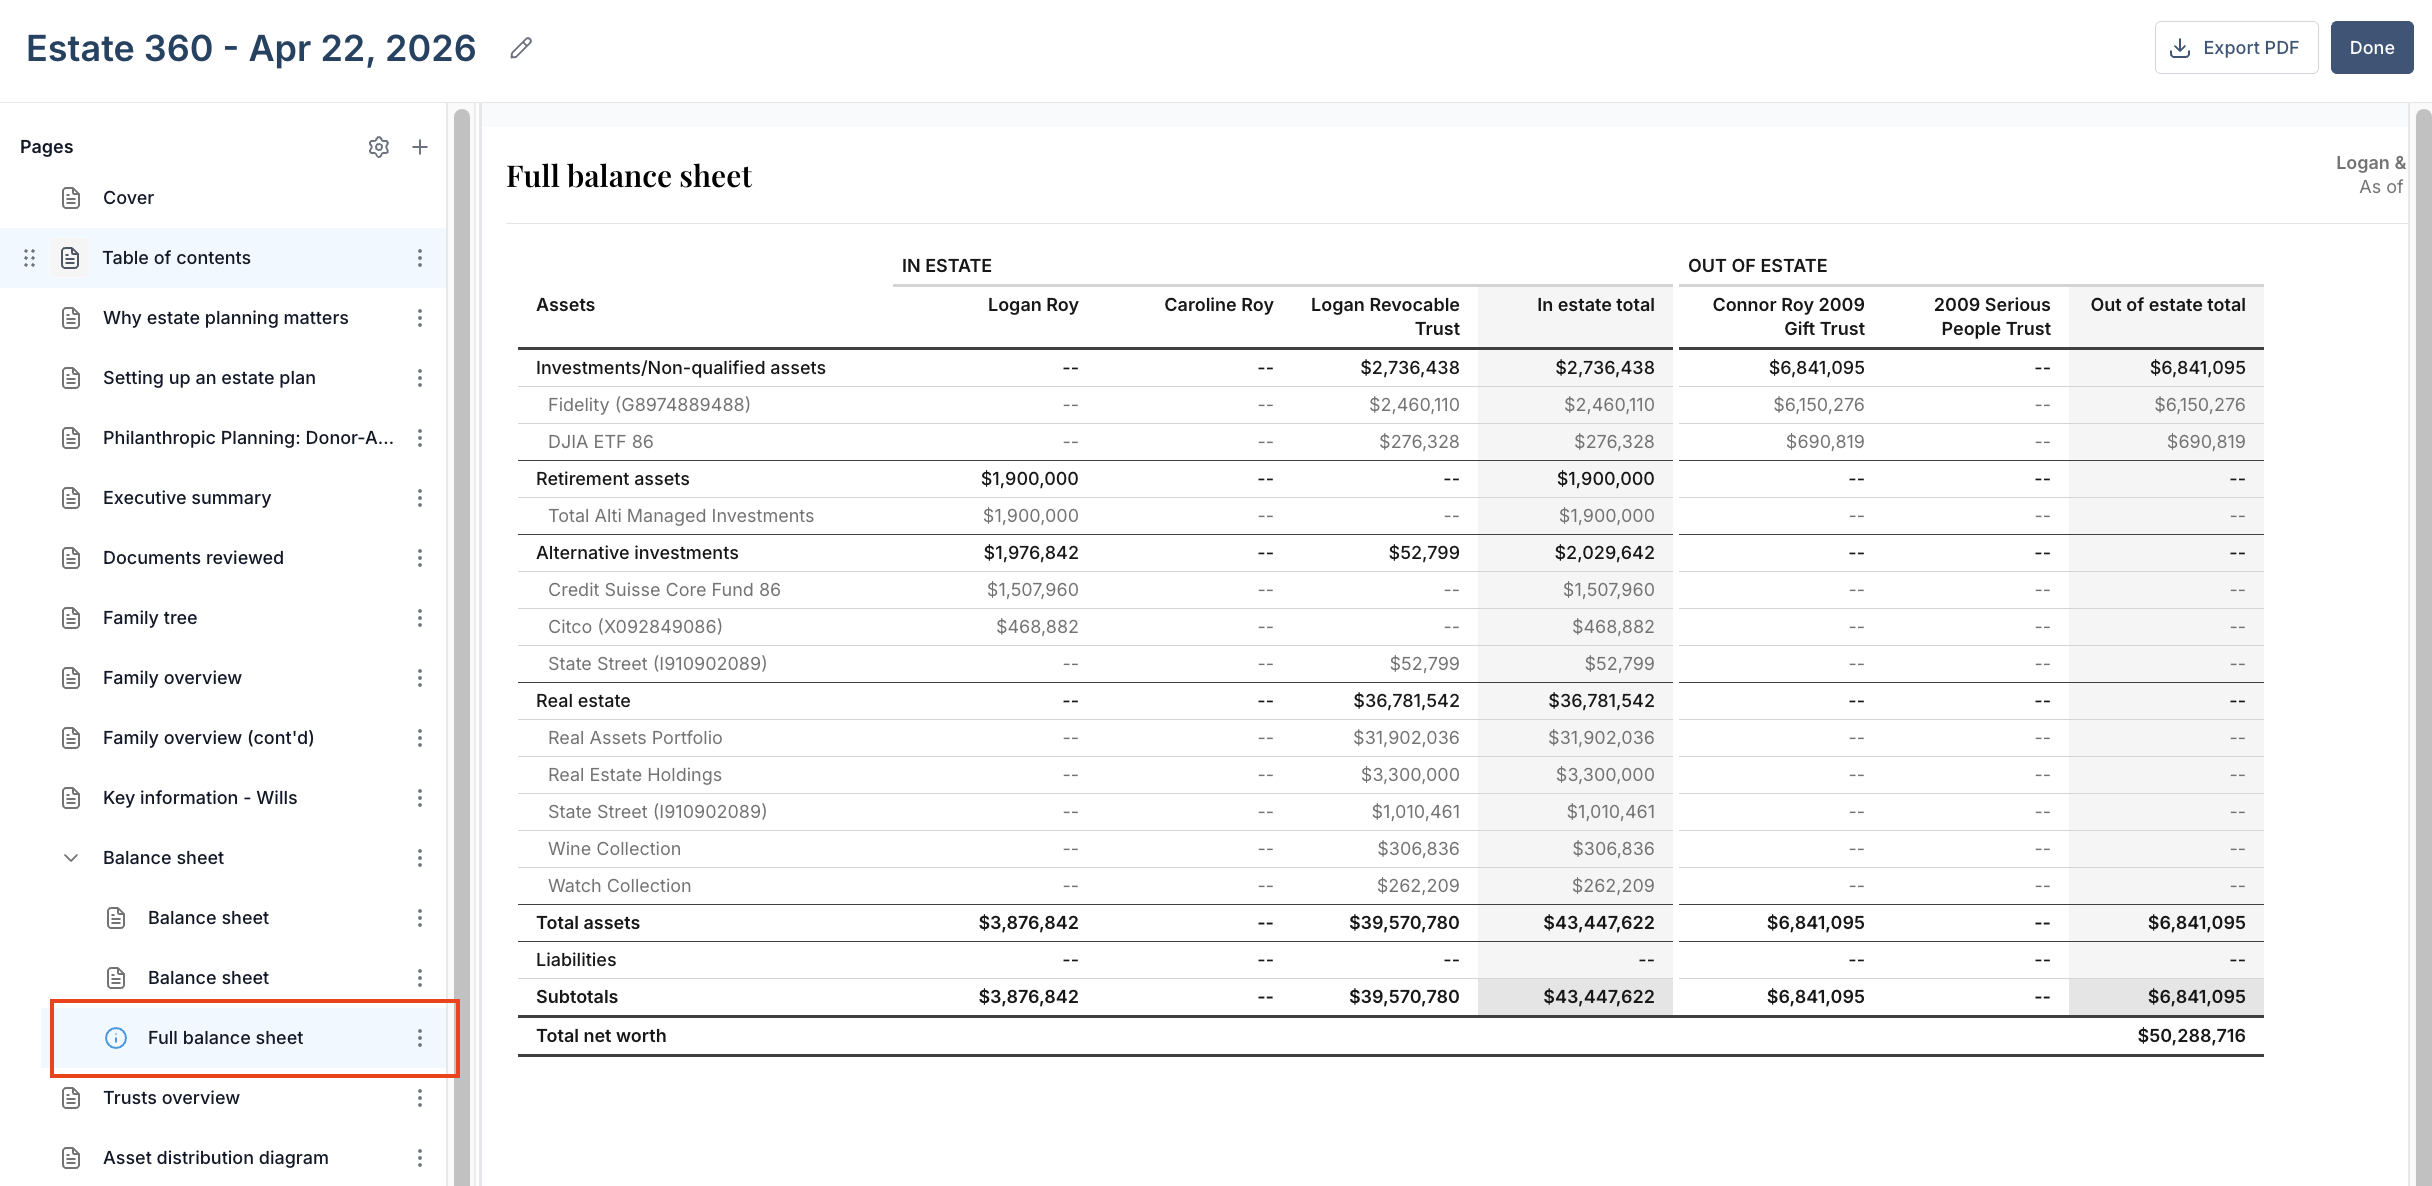
Here, you can delete the balance sheet(s) you created, add a new balance sheet view, or include a detailed balance sheet by selecting Include full balance sheet.
Please Note: The Include full balance sheet view displays the complete balance sheet with all columns and assets. This page is not sized for standard print dimensions. Please review page settings before printing or exporting.
Edit the Balance sheet in presentations
To edit the balance sheet view in presentation mode, click the three vertical dots next to the balance sheet subsection you wish to edit.
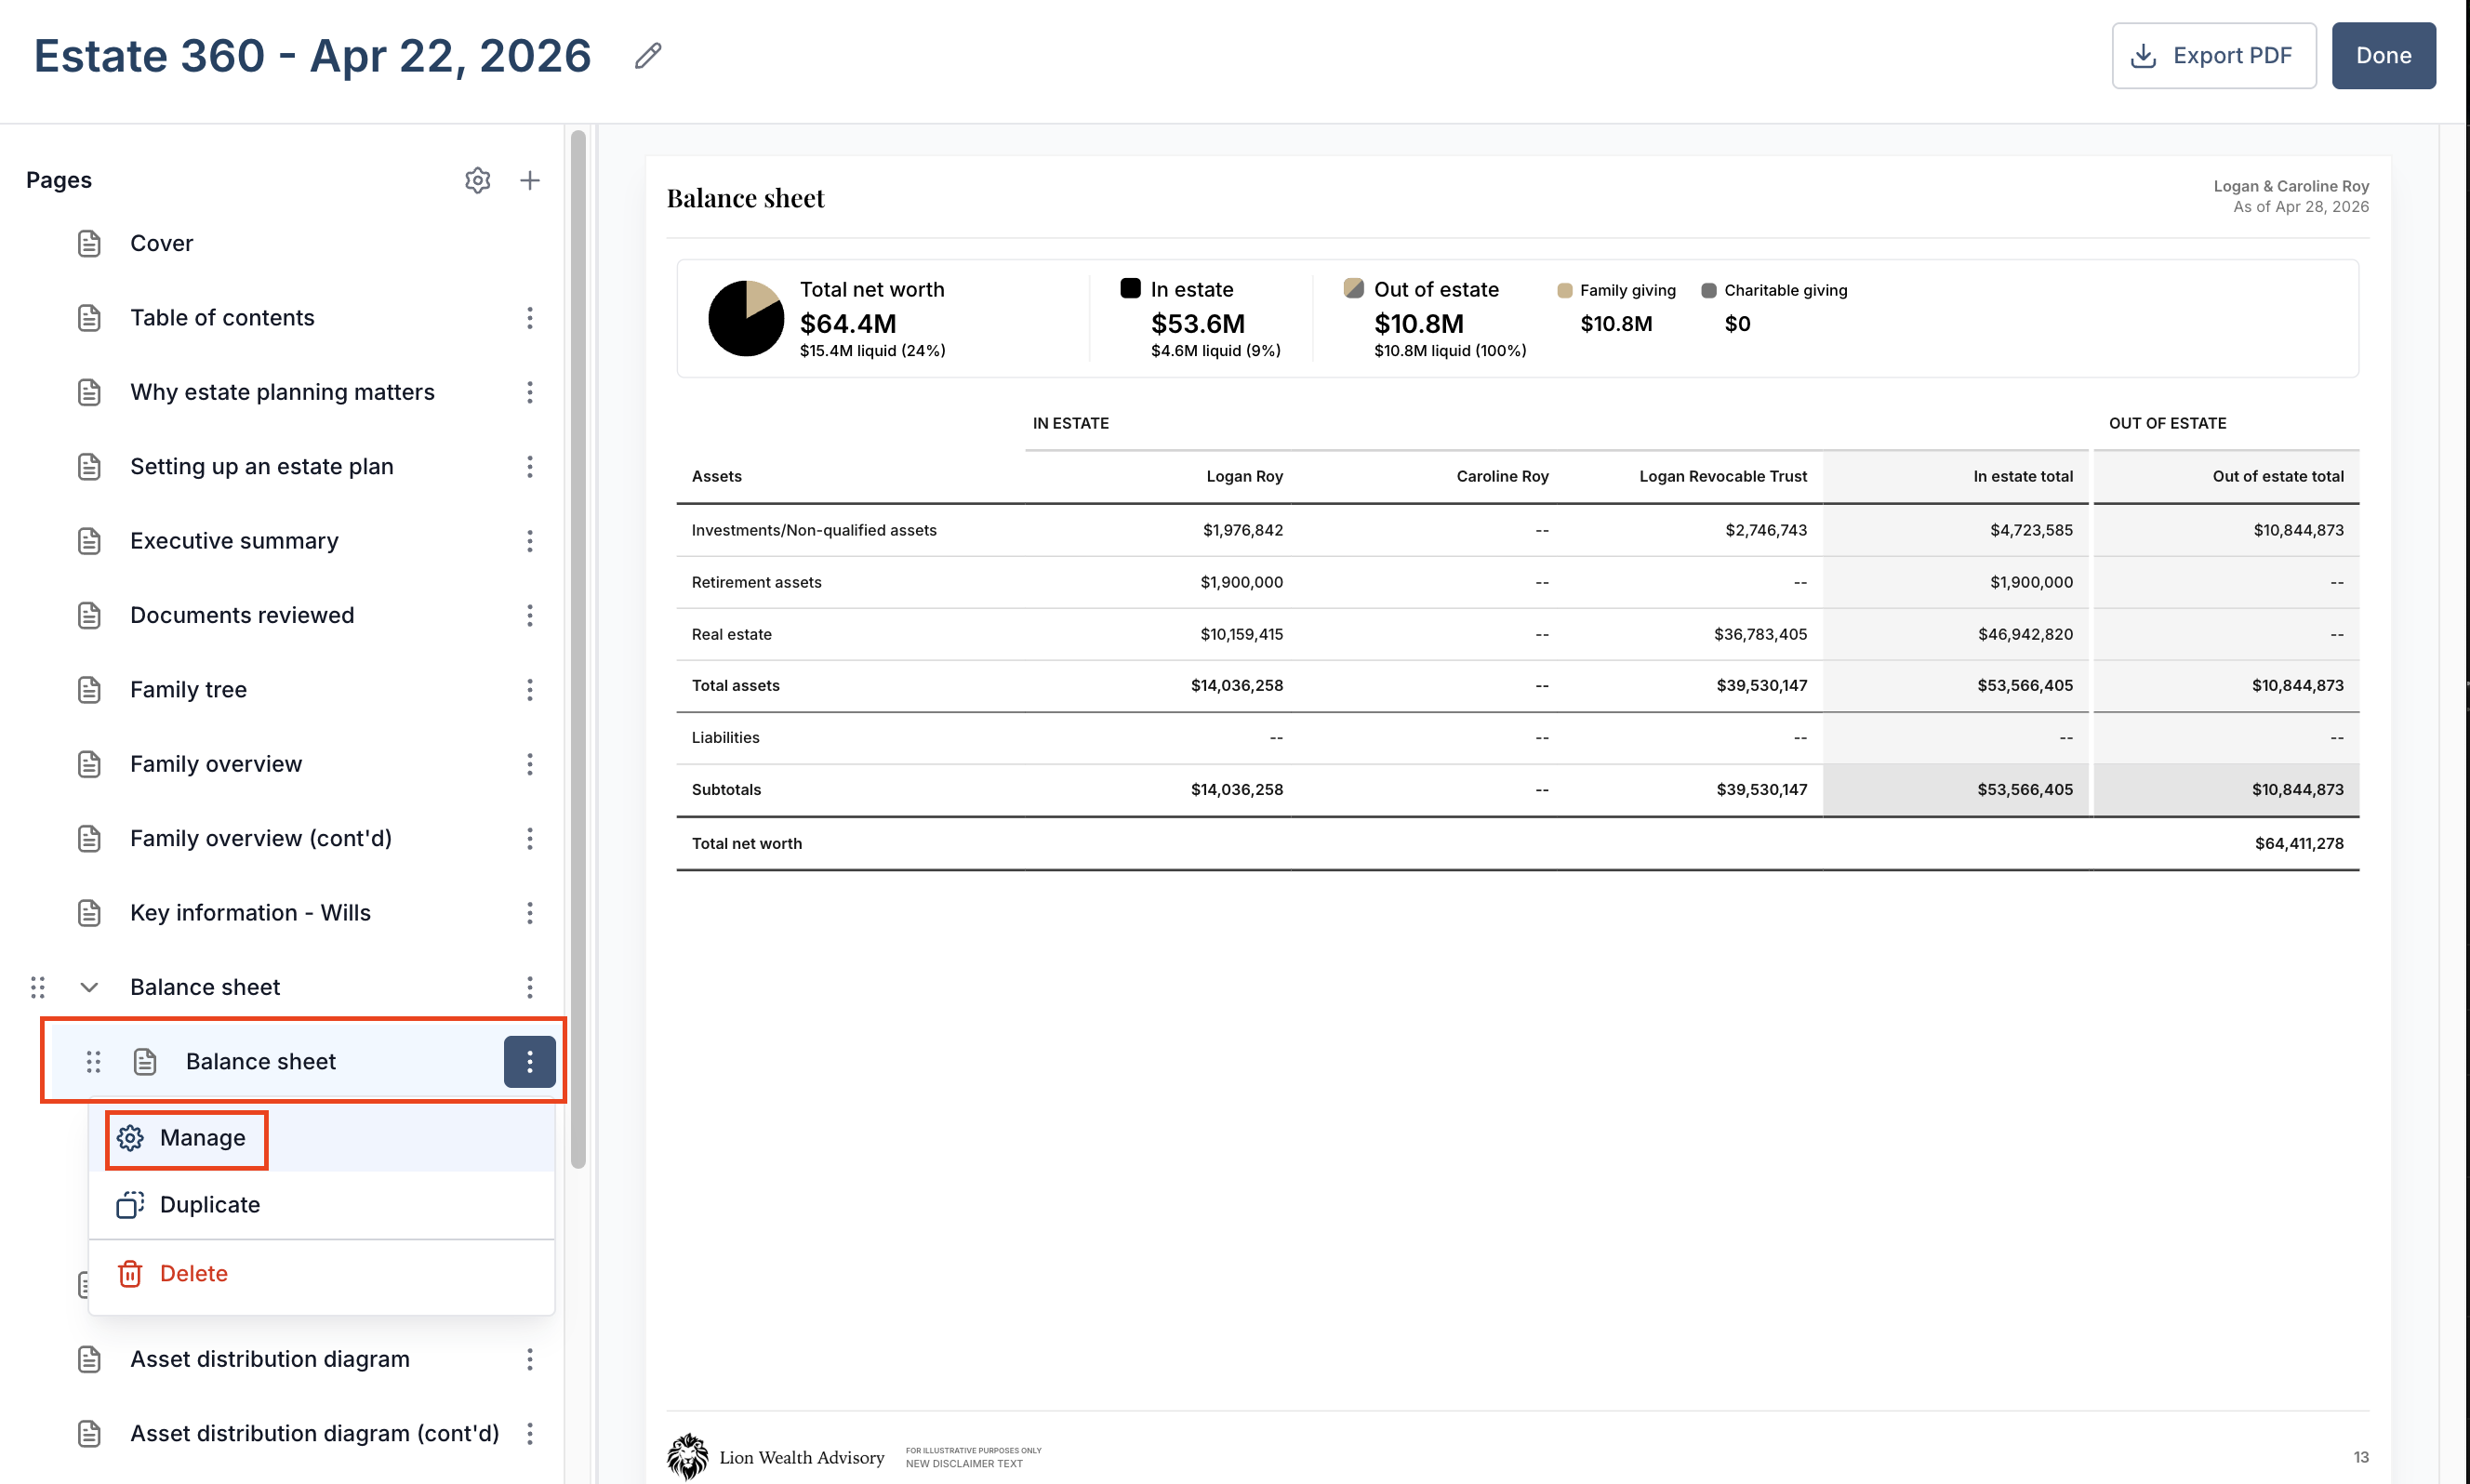
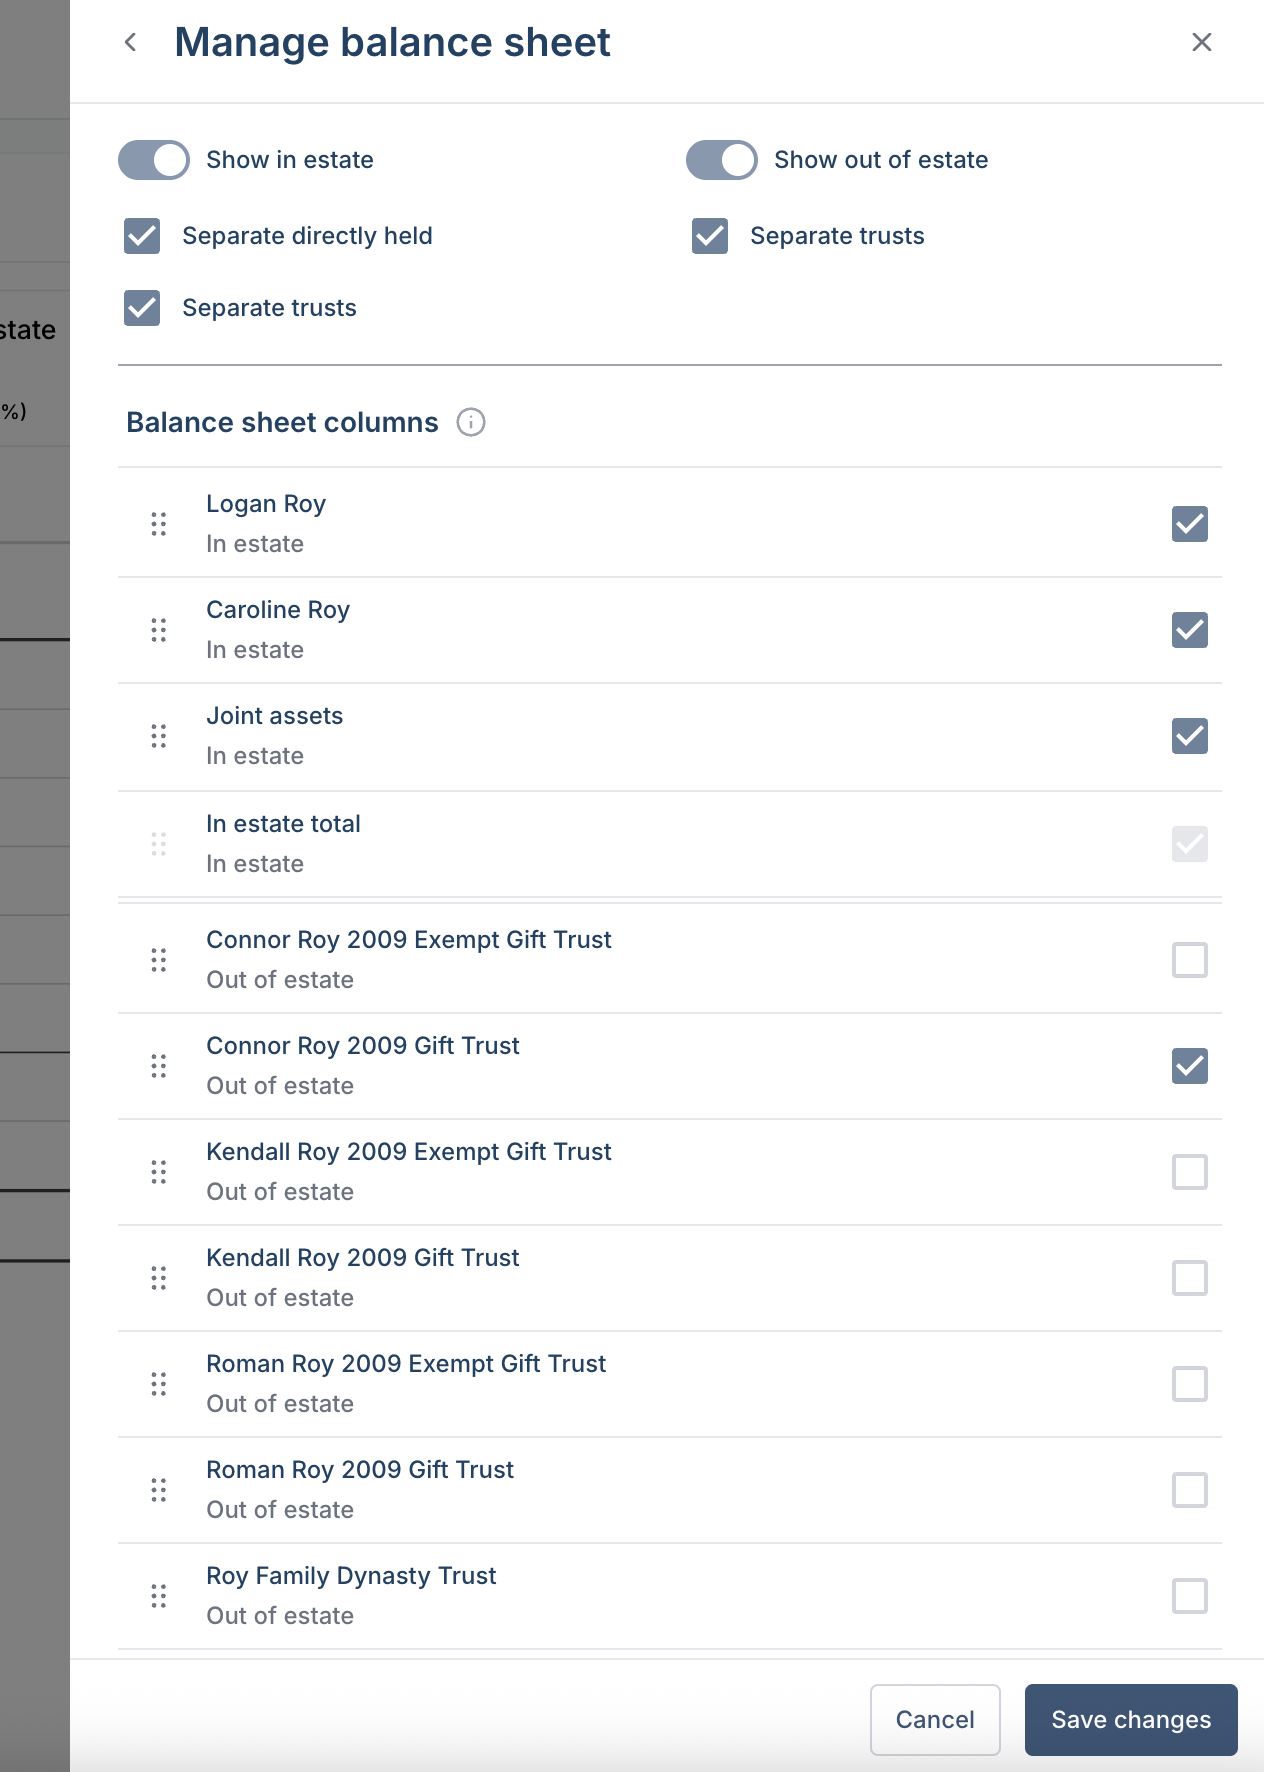
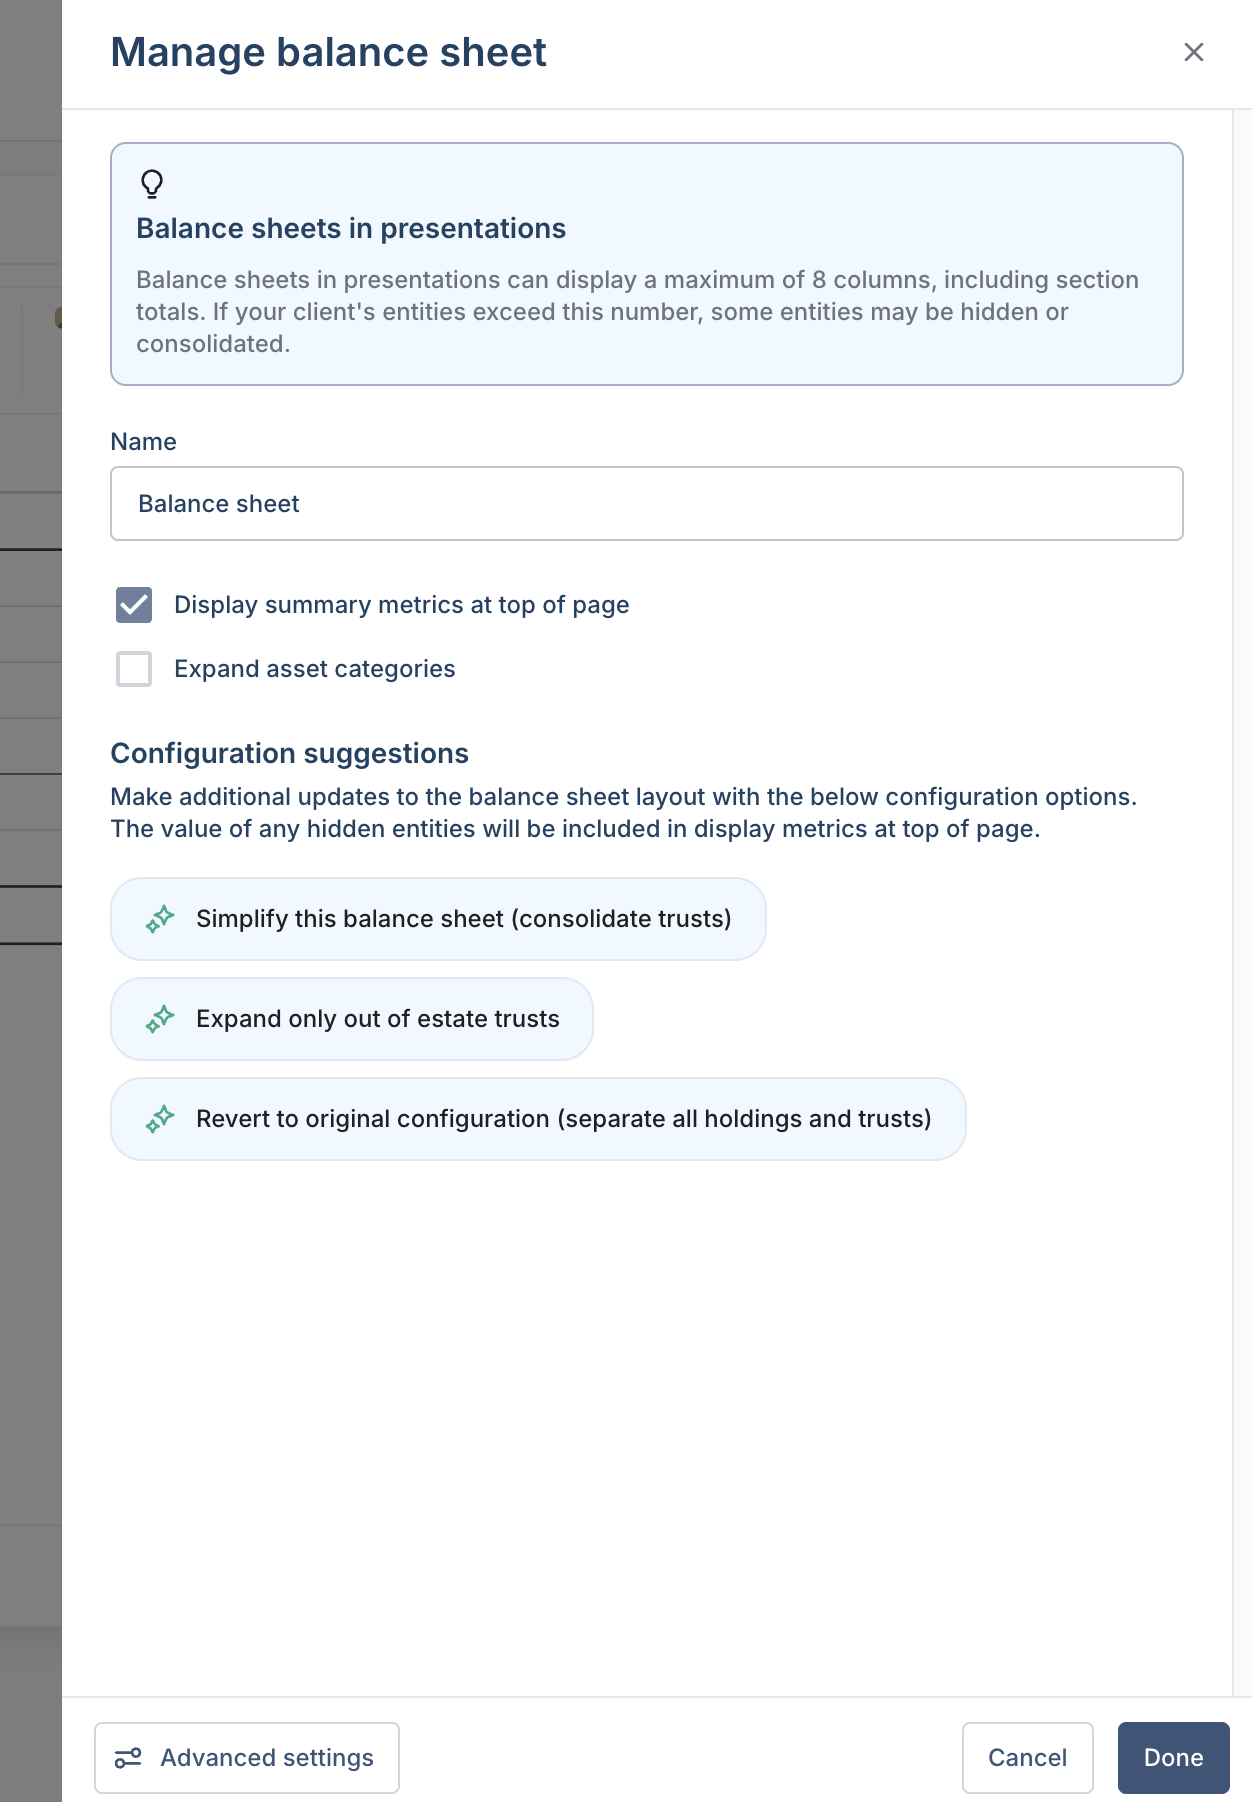
This will pull open the Manage balance sheet pop-up menu, Where you can rename the new balance sheet, display summary metrics or expanded asset categories, or configure using AI suggestions.
Advanced settings
By clicking the Advanced Settings option at the bottom of the Manage balance sheet pop-up screen, you'll have further editing capabilities. Here, you can select the entities you want to appear on the balance sheet, whether in or out of the estate.